Showing posts with label cleaning. Show all posts

Wednesday, July 9, 2014

DIY: Natural Multipurpose Cleaner

Since becoming pregnant, I’ve taken a closer look at some of the chemicals that are part of my daily life and have done some reassessing – I’m talking to you, nail polish!… which is apparently really really bad for you :( I switched over to a homemade cleaner a few years ago and haven’t looked back. Sure, I have to put in a tiny bit more elbow grease, but I’m fine with that. I need the exercise anyway. The one thing I miss from my all purpose cleaner is a “fresh” smell. Most store bought cleaners have a synthesized fresh smell of pine or citrus.. but I was wondering if there was a natural and affordable way I could add the smell of lemons to my vinegar solution so that my house  didn’t smell like salt and vinegar chips. Granted, the vinegar-y smell dries off fairly quickly, but wouldn’t lemon-infused vinegar be so much better?? After a bit of internet sleuthing, I found what I was looking for!

DIY Natural Multipurpose Cleaner

To make this:

  1. Cut up a whole lemon and remove the flesh from the rind*
  2. Add the rind to a lidded jar and pour vinegar over the rind until your jar is full
  3. Put the lid on the jar and store in a cupboard for about 2 days for the lemon to infuse the vinegar
  4. Once infused, strain the infused vinegar into a spray bottle
  5. Optional: Compost the lemon rind :)

*Add the lemon flesh to a pitcher of water to make yourself a refreshing summery drink!

To do a test-run I used the lemon infused vinegar, along with about 2 tbsp of baking soda, to clean the bathtub… it worked like a charm and the smell was great too :)

For cleaning my house, I use a variety of ingredients, all of which can be found in the grocery store, and most of which you can ingest no problem!

Typical ingredients:

  • White vinegar
  • Baking soda
  • Hydrogen Peroxide

Occasional ingredients:

  • Lemons/Lemon juice (if I have them and they’re cheap/in season)
  • Alcohol
  • Olive oil (a drop or two will help shine up wood surfaces!)

Do you have any go-to natural solutions for cleaning? I like to hear what other people use!

Wednesday, October 24, 2012

Pet Hair Management

I'm a self-proclaimed cat lady... I admit it! But what I'm not so fond of is cat hair all over the place. I wanted to dedicate a post to how I keep the pet hair to a minimum in my home and on my clothes, because as much as I love my little fuzzball, I don't want to wear her to work.


1. Brush her daily... or close to it
Riley loves to be brushed on and around her head and chest, and that's about it. I can brush her back a little, but definitely not her legs or tail - nuh-uh.. No way. But that's not all cats; my parents' cats will let you brush them bald. Literally.

Brushing is great to remove the loose fur. I'm a big fan of wire brushes. They seem to work the best on Riley to remove her hair and wire brushes are very easy to clean. I also invested in a Furminator brush. Look it up. It wasn't cheap (+$40 Cdn), but was SO worth the money for me. If you have a cat or dog with a thick undercoat (the downy fur closest to their skin), this brush will thin it out without removing the top coat. But be careful you don't over-brush! My sister went a little nuts using the Furminator on Angel and brushed away all of his undercoat...  

2. Bathe her twice a year (spring and fall)
Riley hates baths. She's a cat so that pretty much goes without saying, but I think washing her helps loosen up some of the old fur so it comes out more easily. Riley also get a little dandruff-y and oily so a bi-annual wash helps with that too.

I find washes are most effective in the spring and fall. Also make sure to use a pet-friendly shampoo! After I'm done washing, I swaddle Riley in a thick towel (She loves this... not!) for a few minutes, then let her air dry. Once she's dry, I brush her with the wire brush. If I don't brush her, her fur kind of sticks together... but she's sooo fluffy and cute once she's washed and dried and brushed!

3. Hairball reducing cat food
I only buy hairball reducing formula cat food. I've tried various brands and like Purina and Iams the best. I thought they just helped Riley not have hairballs, but I think they also help keep her fur in.. does that make sense? One time I bought a bag of regular cat food and I couldn't believe how much more hair I had floating around my apartment!! So now I stick exclusively with hairball reducing formula. In terms of its intended use, hairball reduction, I think it works for that too lol I find a hairball about every two months or so, which isn't bad if you ask me.

4. A damp hand
The quickest and easiest way to remove Riley's hair from fabrics is to wet my hand every so slightly then rub my hand down the fabric. This works to gather the hair up in a clump, which is easily removable. It works like a charm every single time. Note that all of my pet hair issues with Riley stem from the fuzzy undercoat hairs, which are wavy and super fine. If you're finding lots of straight thicker hairs, like what a lab retriever has, you might need a different method.

5. Beige and grey...are your friends
I've come to terms with the fact that I'm always covered in cat hair. It's a part of my life. I've never not had cats/dogs so I'm used to it. But if pet hair on your clothes and in your house bothers you, beige and grey will be your salvation. Specifically light beige and light grey. Don't even try to wear black. For some reason, lighter fur shows up on darker clothes SO much more than darker fur does on lighter clothes.

What are your tips and tricks to pet hair management? I'd love to hear how you keep the fur at bay!

Wednesday, September 7, 2011

Packed Up and Shipped Out

Kevin and I lived in our apartment for 2 years and 2 months - it was the first time either of us had ever lived with a significant other, so I think it'll always be special to us.

That said, moving was tough. Apparently, I don't deal well with open houses. Our landlord was kind of a jerk about it and wasn't giving us nearly enough notice - he's supposed to give 24 hours, but we'd always get less, sometimes only 1 hour's notice. At first, I felt like I should be accommodating, then I got upset about strangers traipsing through our place, then I got bitter and stopped trying to make the place presentable (We were moving after all!).

The last week was probably the hardest because we were living with next to nothing. No couches, no TV, next to no food, no computer, no seats at all... and Riley had already been brought to my parents' house. I would get home from work a realize I couldn't watch TV, go on the computer, or even sit anywhere (except for the bed). Ergo, I spent a lot more time napping than I should have - this was my way of procrastinating with packing. Because let me tell you, even when you think you're almost done, you're not. You're not even close. You still have more to do than you realize or want to even think about!

I finally got the pictures that the realtor used for the MLS listing, so here are the before and after pictures I promised. (I realize the "after" pictures are small, but there was SO MUCH dust in the air so the pictures weren't coming out properly...I think you can click on the image to enlarge it)

 I know the bathroom shot doesn't have any "after" pictures, but it looked pretty much the same - I just took back my extra medicine cabinet and changed back the shower curtain.

I'm almost settled into my new place. Kevin and I have done some trading of furniture in the last week because he had some stuff I use regularly and I had some stuff he used.

Friday, September 2, 2011

Long Weekend Plans

This Monday is Labour Day, so the end of today's work day marks the beginning of a long weekend :-)

I have a lot to do this weekend!

My room is still a disaster. These are the pictures I took right after I'd done the second trip with packed items from my apartment. Since then, I've at least put my bed back together and I gotta say, I'm pretty proud it only took me about an hour! It's the Ikea Brimnes bed (great space saver!) and it literally took me ALL night (like until 3 am!) to put it together the first time around.


I go to the CNE every year, so I'll be making a stop there on Saturday. The Saturday before Labour Day is usually the busiest day, which is less than ideal, but that's what happens when you spend every prior weekend packing and moving :-(
{via}

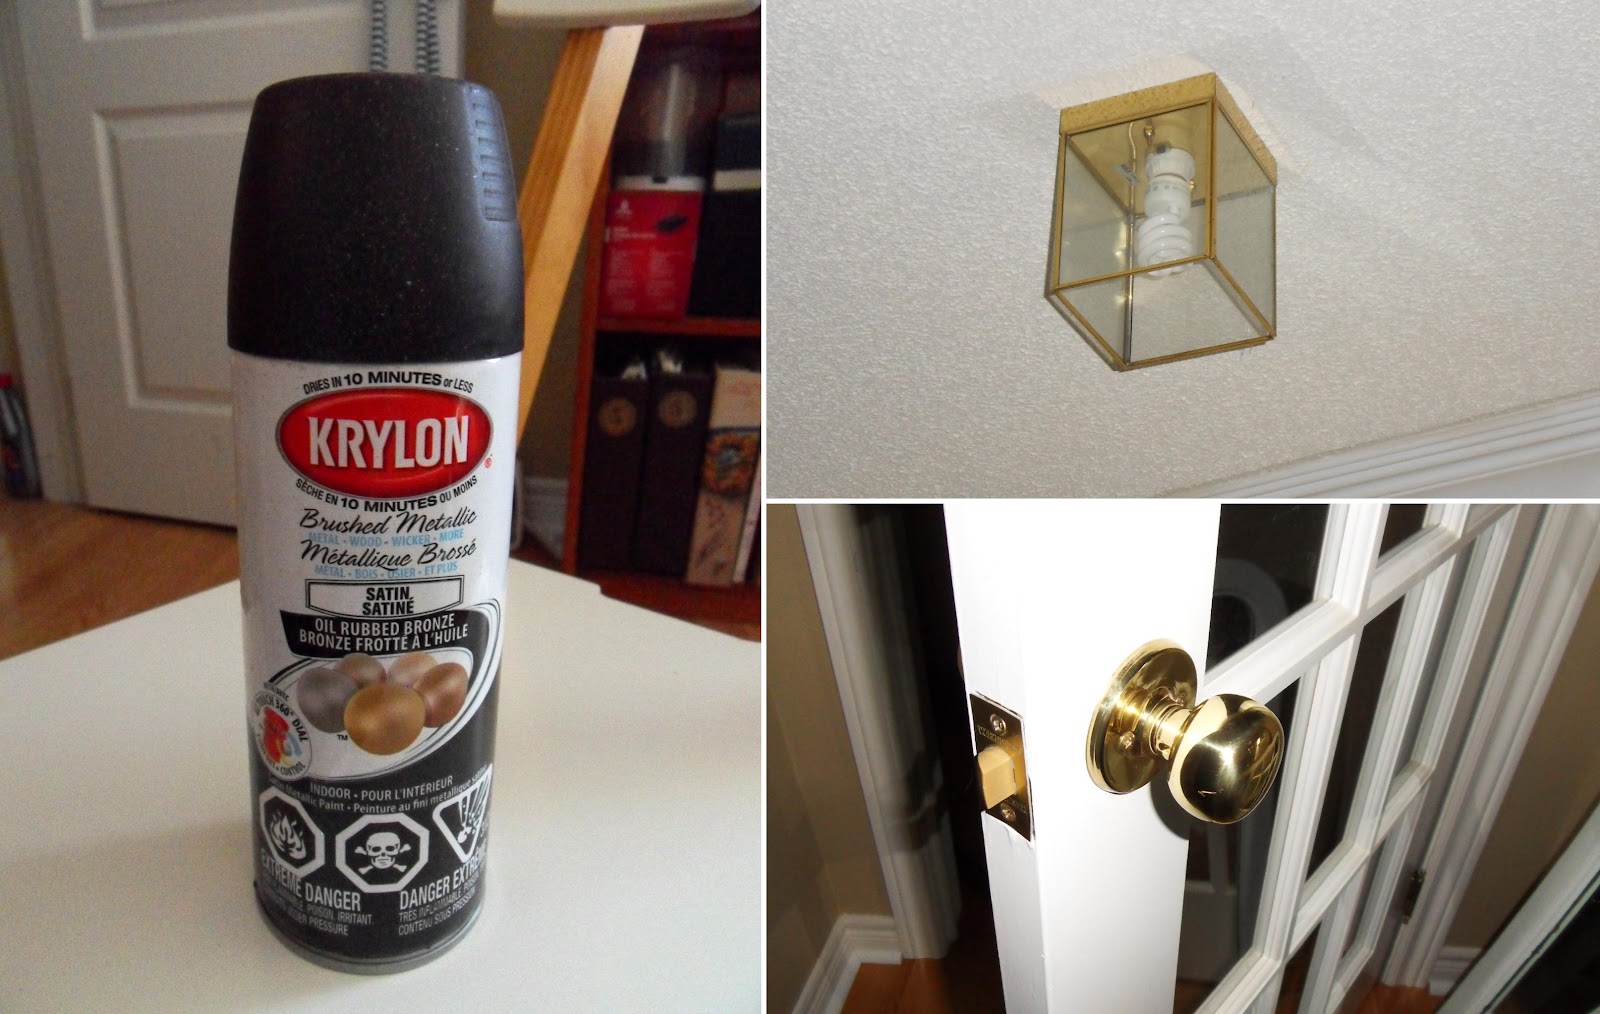
I also have been more than persuaded by Sherry from Young House Love to go out and get a can of Oil Rubbed Bronze (ORB) spray paint lol. She's like the Frank's Red Hot Sauce old lady: She uses that $hit on everything (and it looks GREAT!) I've never used it before so I'm testing it out on the frame that I bought for my Ork poster. I also have the go ahead to use it on some of the hardware in my parents' house. Almost all the fixtures in their house are brass (outdated) so my mother said I could test the door knob and hinges on the basement door (yay!) and test out the light fixtures on the first floor (which she doesn't plan on keeping anyway so she's got nothing to lose).

Do you have any exciting plans for this long weekend?

Thursday, June 16, 2011

Plant Killer on the Loose

I love plants and flowers and I've loved them as long as I can remember - in any form... potted, cut, hanging, terrariums, dried, silk...all good. I imagine myself having a beautiful garden in the front and back of my house one day - similar to what my mom has going on, but with less grass and more garden. 


But here's the problem:    I can't seem to keep them alive.


I know it sounds pathetic, but it really upsets every time I kill a plant. And trust me, it happens way too often! When my mom comes to visit, she (not so subtly) eyes all my plants and graciously takes the dying one(s) home with her and nurses them back to life. 


I've always been called a tree hugger and I'm a Virgo (apparently we loooove nature) and I come from a line of women (my grandmother and mother) who can pluck a sprig from a plant and grow a whole new freakin' plant!! Why didn't I inherent this green thumb?? It's embarrassing how fast plants wilt in my care. My defense is I just love them too much. Does this happen to other people??


My total plant collection includes 2 bamboo plants, a potted Gerber daisy, and 2 potted 4" Osteospermums in my living room, and an unidentified plant from Ikea that resides in my bathroom. I also have one currently in my mom's care - it's a vine of some sort...


In any case, my plants underwent some care this weekend: I cleaned all of their pots/vases, pot saucers, and wiped down their leaves. I'd like to think they "feel" a little better about being in clean pots and looking all nice with their lustery leaves, so maybe they'll live a bit longer now.


Obviously these aren't the same leaf, but after I wiped them all, I couldn't remember which one I used for the before photo...


 I emptied out the water, rocks, and marbles from the vase into the bathtub. I collected the rocks into a colander then sprayed them off with hot water to get rid of the residue. I refilled the vase halfway with water then put the rocks back in (large to small) a few at a time.


 Kevin gave me this plant for my desk at work when I first got hired, but the air circulation isn't great and I have a north facing window, so I brought it home with me. It used to be a bright green container, but I spray painted it white.

I cleaned off the stems and rocks 
The after shot of the bamboo shoots is making me crave asparagus...

Wednesday, June 15, 2011

A Dark and Scary Place - Under the Kitchen Sink

Everyone has a place in their house that they'd rather people didn't see. For me, it's under the kitchen sink. It's pretty horrifying down there... There's a mix of the compost bin, cleaning products, foil, parchment paper, plastic wrap, lunch containers, a bunch of different cooking oils, garbage bags, etc.... On top of that, it's just plain dirty and stinky with crumbs and the smell of the compost bin. When we have people over for dinner and they ask where our compost bin is so they can scrape their scraps in there, I hurriedly tell them to just leave their plates on the counter and I'll deal with it later. Oh the shame!

Here's what I was working with:


Here's the horrifying part... All of the gross old contact paper was mostly covered up by my blue storage containers - thank goodness! It was like a crumb city down there...


I pulled up the old contact paper, which came up very easily. Then I spent about 10 minutes trying to get rid of the adhesive so I could work with a clean surface, but it didn't come off. Oh well. New contact paper was going to shortly be covering up that adhesive, so I guess it didn't really matter much...


This is the paper I chose. I bought it for $3.99 from Canadian Tire. I guess I could have looked around elsewhere for a better price (this stuff is probably sold at Dollarama), but I was already at Canadian Tire and I figured super cheap stuff will probably just un-stick in a couple of weeks


It was super easy to apply! The top left corner is lifted a bit because there's foam insultation popping up in that corner from under the bottom of the cabinet.


Here's the after shot! It's a lot cleaner, brighter, and better organized. Now my dinner guests can scrape away their own scraps!

Monday, June 6, 2011

Righty Tighty Lefty Loosey

Screws and bolts loosen up over time, so this weekend I went around and tightened things up. There were two items that were particularly wobbly: the kitchen faucet and the legs on the kitchen table.


It's hard to really show with pictures how loose the faucet was, but here's my attempt:


I checked under the sink to see what kind of loose bolt I was dealing with and it was a thin hexagonal bolt so I got my adjustable wrench from my trusty toolbox. A few quick righty tighties underneath my cramped sink and that sucker was nice and sturdy once again. While I was at it, I cleaned out the sink using this method because it was dirrrrrrty. 


I also tightened up all of the legs on the kitchen table. One leg was particularly loose and it turns out there's a stinkin' crack in the leg!


 After a couple of righty tighties, with my woefully underused Allen keys, and things were lookin' good once again. 

Sunday, May 22, 2011

It's Grout Scrubbing Time

While I'm not a particularly tidy person, I love me a clean bathroom!  Whenever my boyfriend or I start using a new toothbrush, I know exactly what my plans are for the old one.

Deep. Clean. The. Grout.

I'm not sure how often grout is supposed to be deep cleaned, but only two corners get visibly dirty and they seem to stay clean enough if I do it every time one of us replaces a toothbrush.

These are the two gross corners. Interestingly, the rest of grout remains remarkably white That being said.... these corners have been looking quite ahem... NASTY as of late. Case in point:


Oh the horror...

Baking soda and lemon (and the ol' toothbrush) to the rescue!


If you've never used baking soda and lemon/vinegar to clean before, pleeeease try it. You'll be amazed!
Here's how I did it:
  • 1/8 cup of baking soda
  • 1 lemon (cut in half)
  • 1 old toothbrush
  1. Dip the toothbrush in the baking soda
  2. Rub the lemon half on the wall so it gets wet with lemon juice
  3. Scrub away with the baking soda-covered toothbrush in the areas you just wet with the lemon juice.
You'll see a nice fizzy action going on! The baking soda is abrasive so it really gets the dirt out and lemon leaves a very nice scent. Above all, you don't have to worry about any of this:

Source
I kid you not, a few years ago my mom nearly passed out when she accidentally made mustard gas while cleaning the bathroom by mixing ammonia and bleach. Harsh cleaners just aren't worth the risk when products around the house do an amazing job. Lemon and baking soda also works very well at getting the bathroom fixtures all shiny!


 Here are some before and after pics of the bathtub corners:

Take that grout!
Related Posts Plugin for WordPress, Blogger...